Steps to removing an extension that was installed by You:
In Chrome…
i. Locate the three dots in the top right corner of your browser.
ii. Find More Tools
iii. Find Extensions.
iv. Locate the extension you wish to remove and click Remove.
In Edge…
v. Locate the three dots in the top right corner of your browser.
vi. Find Extensions.
vii. Find Manage Extensions.
viii. Locate the extension you wish to remove and click Remove.
Steps to removing an extension that was
installed by an Administrator:
Finding the Extension in Chrome.
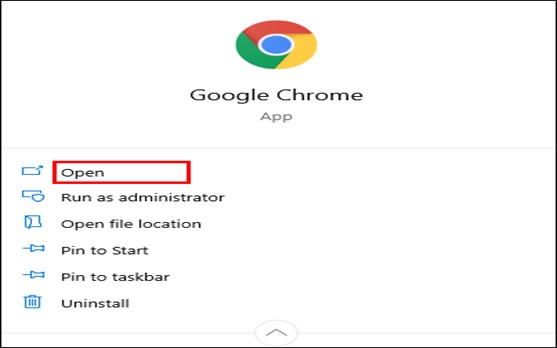
1. To begin uninstalling an administrator extension on your Chrome browser, first, you need to open the browser by clicking on the yellow, green, and red orb surrounding a blue center icon.
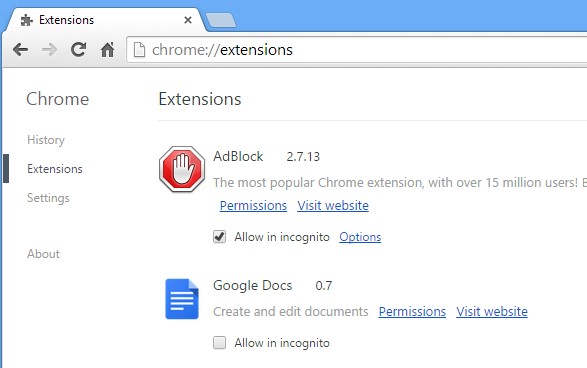
2. Type "chrome://extensions" into the URL bar and press enter ↵ Enter. It will allow you to access a list of all the extensions installed on your browser, including the disabled ones.
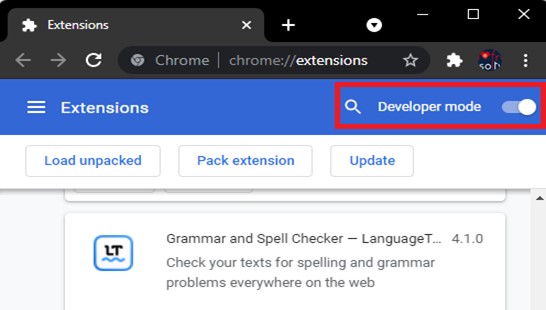
3. Next, look for the "Developer mode" switch and click on it to turn it on . When turned on, the button will light up in blue and point to the right.
● Enabling this mode will provide more information about each extension displayed in its tile and allow you to remove the ones that are difficult to uninstall.
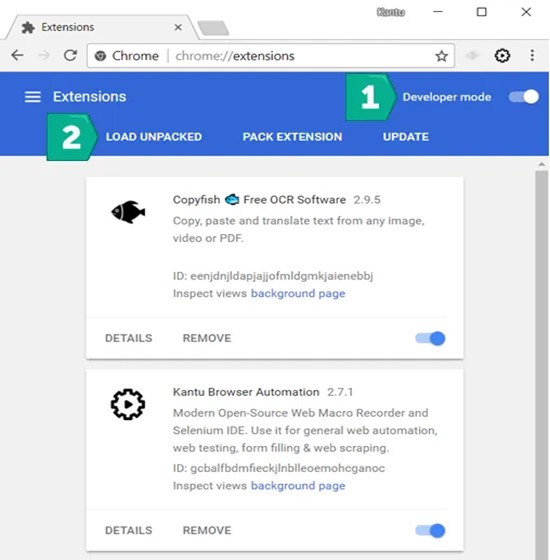
4. If you encountered an extension that cannot get uninstalled, it likely got added through a policy. In this case, you must copy its ID to initiate the uninstallation process. To do this, highlight the ID next to the extension and press Ctrl + C to copy it to your clipboard.
● You can paste the ID into a text editor such as Notepad or Sticky Notes for safekeeping.
Removing the Extension ID in the
Registry.
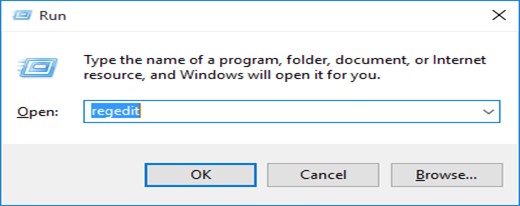
1. First, click on the Start menu icon to open the menu, then click on the Run function. Type in "Regedit" and press Enter to launch the executable app.
● You will get notified if the "Registry Editor" program can change your device upon opening. Press Yes to continue.
● It would be best to back up your computer before making any adjustments to the Registry, as incorrect changes can cause irreparable damage.

2. You can use the Edit menu at the top of the window to find a specific entry in the Registry. Click on Edit Edit and select Find Find, which will appear in the dropdown menu's bottom.
● Alternatively, press Ctrl + F with the Registry Editor open to launch a separate Find window. When changing your computer's settings, these functions can save you valuable time and effort.
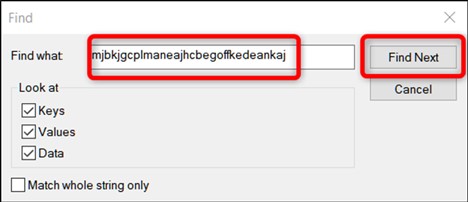
3. Locate the extension ID by pasting it into the search field in the Registry Editor. To do this, copy the ID to your clipboard (e.g., by selecting it in your browser extension settings), then place your cursor in the search field and press Ctrl + V to paste the ID. Click "Find Next" Find Next to let the Registry Editor locate the corresponding text.
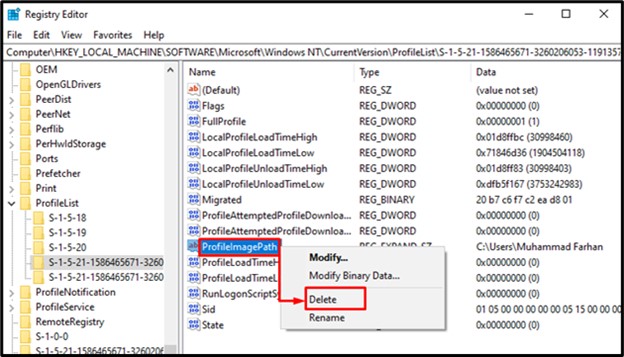
4. Once you locate the ID, right-click the value in the right panel of the window and select "Delete." Delete
● Just make sure you're clicking on the name of the value (not the data value), as deleting the latter will only remove the data string.
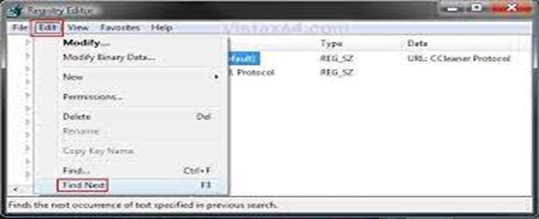
5. After deleting the value, click "Edit" Edit at the top of the window and select "Find Next" Find Next in the dropdown menu.
● Alternatively, press F3 on your keyboard to prompt the "Find Next" feature.
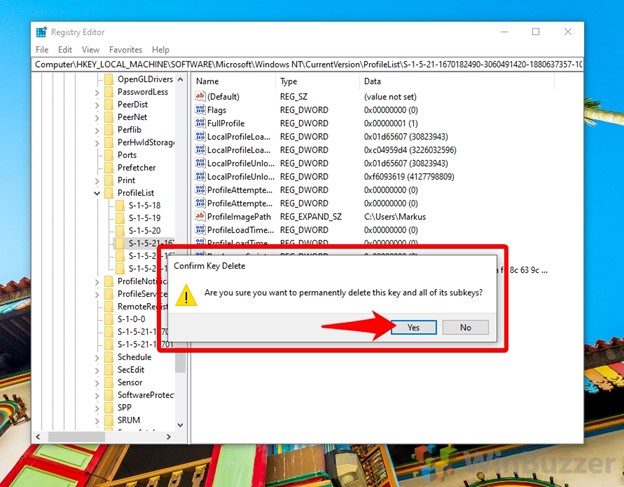
6. Right-click on the value and select the Delete Delete option. Typically, you can find this value on the right panel of the window. It is essential to note that there will be two entries with the same ID that you need to delete.
● Navigate to the following locations to locate the entries: HKEY_USERS\Group Policy Objects\Machine\Software\Policies\Google\Chrome\ExtensionInstallForcelist. HKEY_LOCAL_MACHINE\SOFTWARE\Policies\Google\Chrome\ExtensionInstallForcelist
7. Once you have found them, you can delete the two entries. After completing the process, close the Registry Editor. You can achieve this by clicking the 'x' icon in the window's upper right corner.
Lastly, close the web browser by clicking the 'x' icon again to ensure your changes appear. You can relaunch the Google Chrome browser from your Start Menu, Desktop, or Taskbar. It will execute the changes made in the Registry Editor, and you should see the desired outcome..
1. You must first open the web browser to remove an extension from Google Chrome. To do this, click on the yellow, green, and red orb that surrounds a blue center, which is the icon for Chrome.

2. Once you have opened Chrome, type "chrome://extensions" into the URL bar and press Enter ↵ Enter. It will take you to a page that displays all the currently installed extensions on your browser, even if they are disabled.
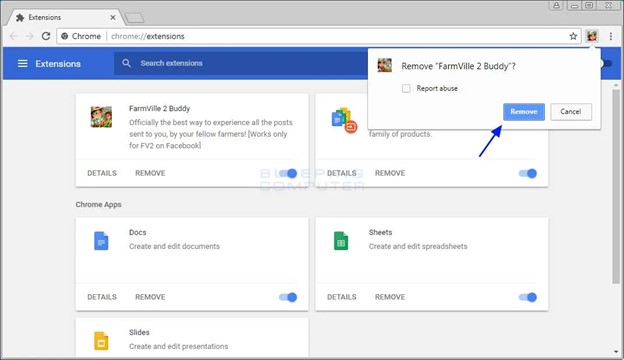
3. Click on the "Remove" button next to it. The attachment will get successfully deleted if it has the same ID as the one you deleted from the Registry Editor.
● After deleting the extension, it is highly recommended that you conduct an anti-malware scan to ensure no other malicious files are lingering in your system. It will help safeguard your computer against potentially harmful programs installed without your knowledge.